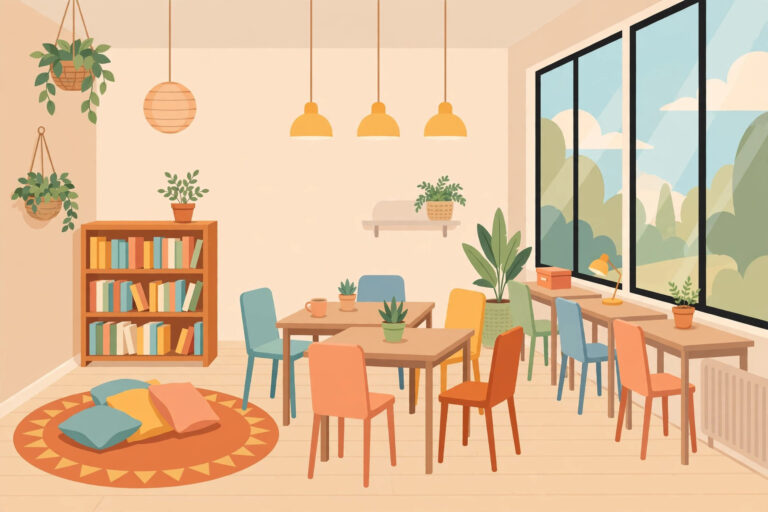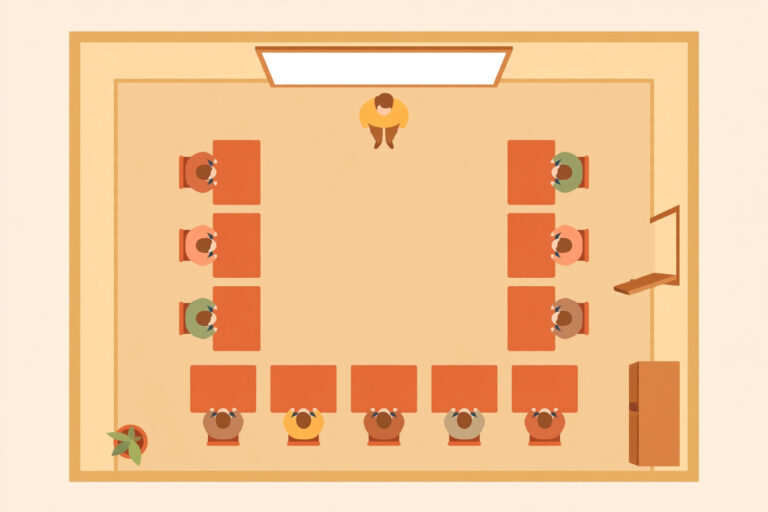
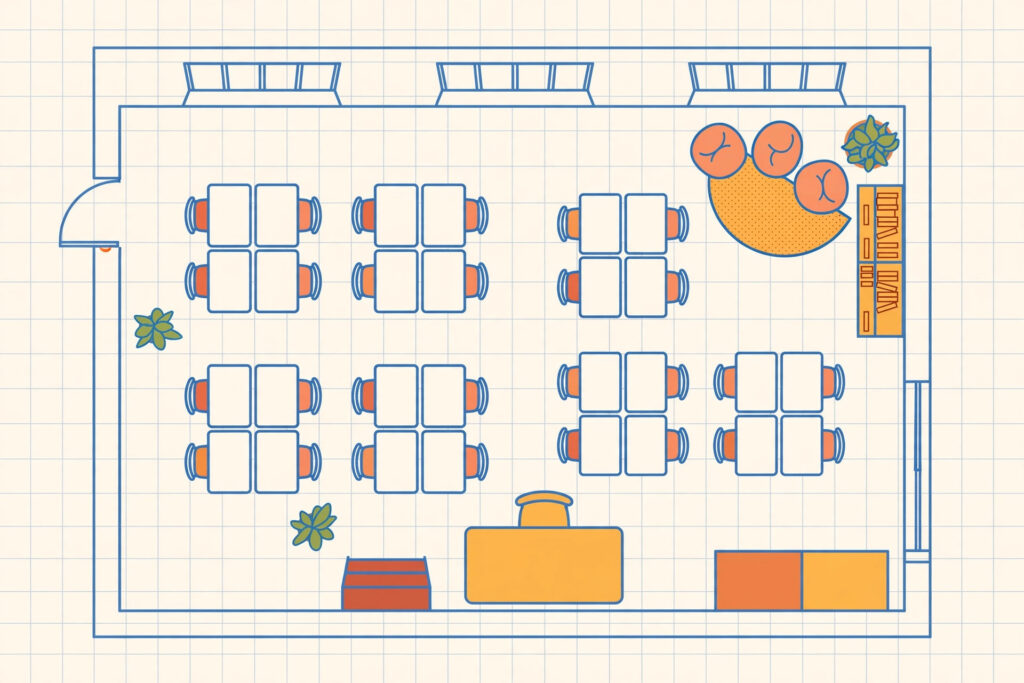
A classroom floor plan is a simple bird’s-eye sketch of your room showing exactly where every desk, shelf, and learning zone will go. Before you drag a single bookshelf across the floor, sketching your classroom floor plan on paper lets you test ideas, spot traffic jams, and make sure every student can see the board — so you spend less time rearranging and more time teaching.
Whether you’re setting up your first classroom or rethinking a familiar room, this guide covers the six zones every great layout needs, seven ready-to-copy layout ideas, and a free method for drawing your own plan with grid paper and scissors.
In this guide6 sections
Why You Should Plan Your Floor Plan Before Moving Furniture
Moving heavy furniture is exhausting — discovering mid-semester that your reading corner blocks the door is worse. A paper plan lets you experiment without breaking a sweat: sketch three or four arrangements in ten minutes and compare them side by side.
Planning on paper reveals what you’d otherwise miss: morning sun glaring on the whiteboard, or 28 students crossing the room for the pencil sharpener. Research on how classroom design shapes attention and learning confirms that physical space directly affects student focus. A few minutes with a pencil now saves weeks of frustration later.
The 6 Zones of a Great Classroom Floor Plan
Every effective classroom floor plan is built from the same six zones, and each one deserves a deliberate place in your plan — even if some zones are just a corner.
1. Teaching Zone
Your command center: the board, your presentation spot, and open floor space to move while you teach. Keep it at the front with a clear sightline to every seat, and leave yourself room to circulate freely.
2. Student Work Zone
Where desks or tables live. Arrange them to match how students actually work — clusters for collaboration, rows for focused tasks — and make sure every seat faces the teaching zone without neck-craning.
3. Collaboration Zone
A flexible area for group work, discussions, and projects: a rug, movable tables, or simply open floor space. Keep it clearly separated from quiet areas so noise never clashes with concentration.
4. Quiet Corner
A low-stimulation retreat for independent reading, cooldowns, or one-on-one check-ins. A bookshelf, a beanbag, and a small rug are enough — every layout benefits, especially in the elementary grades.
5. Storage Zone
Cubbies, shelves, and supply stations belong along the walls — never in the middle of foot traffic. Label everything so students can find and return materials without interrupting you.
6. Traffic Paths
The invisible highways of your room: door to desks, desks to board, everyone to the supplies and back. Mark these routes on your classroom floor plan first, then place furniture around them — never through them.
7 Classroom Floor Plan Ideas to Copy
Steal one of these seven layout ideas as your starting point, then tweak it for your room’s quirks. Each walkthrough starts at the doorway so you can picture it instantly.
1. Elementary Clusters Plan
Walk in: the door is on the left wall, with four clusters of five desks angled toward the front board. A reading rug with low bookshelves anchors the back-right corner, cubbies line the back wall under the windows, and your desk sits front-left overlooking every cluster. Traffic loops around the clusters — no bottlenecks.
2. Middle School U-Shape Plan
The door opens at the back-right. Desks form a wide U facing the front board, so every student sees both you and their classmates — ideal for discussions. The open floor inside the U handles quick stand-up activities, your desk tucks into the front-left corner, and supply shelves run along the left wall with a small group table at the back.
3. High School Lecture + Lab Plan
Enter through the front-right door into neat rows facing the board. Behind the rows, two long lab tables create a second zone for experiments and group work. Your desk and document camera sit front-center, storage cabinets line the back wall, and a wide center aisle keeps every student within reach.
4. Small Classroom Plan
In a tight room, every inch counts. The door is front-left; desks go in snug pairs in two columns facing the board, leaving one strong center aisle. Push your desk flat against the front wall, run narrow shelving along the right wall, and turn the back two feet into a standing-height collaboration strip.
5. Large Classroom Plan
A big room must be filled with purpose. From the double doors at the back, students pass cubbies on the right into desk clusters in the middle. The front holds the teaching zone, the left side becomes a project area with long tables, and the back-left corner gets a quiet reading nook with rugs.
6. Special-Education Friendly Plan
Predictability is everything here. The door sits on the right wall near a visual schedule at student eye level. Desks form a calm horseshoe facing the board with wide, wheelchair-friendly aisles. A sensory corner occupies the back-left, supplies live in labeled bins along the back wall, and nothing blocks the traffic paths — ever.
7. Flexible Seating Plan
Ditch assigned desks entirely. From the door on the left, students choose: standing desks along the windows, floor cushions on the central rug, traditional desks in pairs at the back, or wobble stools near the front. The teaching zone stays fixed at the front board, storage hugs the right wall, and a simple check-in chart keeps the rotation fair.
How to Draw Your Own Classroom Floor Plan (Free Method)
You do not need software. Grab grid paper, a ruler, and scissors — this takes about twenty minutes. Measure the room, draw the outline at one square per foot, and mark the door swing, windows, and outlets.
Next, cut out paper rectangles to scale for each furniture piece: desks, tables, shelves, your desk. Arrange them on the grid, starting with traffic paths — sketch the routes students will walk every day, then fit furniture around them. Test your classroom floor plan by tracing a student’s full day: entering, sitting down, grabbing supplies, lining up. If any path crosses another, rearrange now, before you lift a thing.
5 Classroom Floor Plan Mistakes That Kill Classroom Flow
These five mistakes appear in almost every bad classroom floor plan — and the fixes are simple if you catch them on paper.
1. Blocking the Door Swing
Desks or shelves placed where the door opens create a daily collision zone. Fix: draw the door’s arc on your plan and keep it permanently clear.
2. Trapping Yourself Behind the Desk
If your desk sits between you and the students, you will teach from behind it all year. Fix: push your desk to a side wall and teach from the open floor.
3. One Giant Traffic Jam
A single narrow aisle for 30 students means chaos at every transition. Fix: design two or three wide paths in your plan so movement splits naturally.
4. The Board Nobody Can See
Window glare or a pillar can hide half the board from some seats. Fix: mentally sit in every seat and check sightlines before finalizing anything.
5. Storage in the Middle of Everything
Supply shelves in high-traffic areas become bottlenecks and climbing frames. Fix: move storage to walls and corners, labeled and student-accessible.
Frequently Asked Questions
What is the best classroom floor plan for elementary students?
Clusters of four to six desks work best for any elementary classroom. They support collaboration, make transitions easy, and let you reach every group quickly. Pair clusters with a reading rug and clear traffic paths.
How much space should I leave between desks?
Leave two to three feet between desk edges so everyone passes comfortably. On your plan, keep aisles near the door and supply areas even wider — three feet or more.
Where should the teacher’s desk go in a classroom floor plan?
Against a side or front wall — never in the center. Your desk exists for paperwork and small-group conferences, not for teaching from. Keeping it out of traffic preserves space where it matters.
How do I plan a layout for a very small room?
Prioritize ruthlessly: teaching zone, desks, and one clear traffic path first. Use vertical storage, push your desk flat against the wall, and swap a full group zone for a standing-height collaboration strip.
Should students help design the classroom layout?
Absolutely — especially from upper elementary onward. Let students vote on cluster arrangements or quiet-corner features; ownership of the space translates into ownership of behavior.
A great classroom does not happen by accident — it happens on paper first. Sketch your classroom floor plan using the zones and ideas above, test the traffic flow, and fix mistakes before moving a single desk. For more inspiration, explore our classroom layout ideas and fine-tune your classroom seating arrangements once the zones are set.